iOS Simulator + Charles Web Debugging Proxy

Um SSL Datenverkehr aus dem iOS Simulator auf dem Charles Web Debugging Proxy zu monitoren muss das Charles Zertifikat auf dem Simulator als „vertrauenswürdig“ eingestellt werden.

Dafür speichert man das Zertifikat auf dem Rechner und zieht es danach auf den Simulator

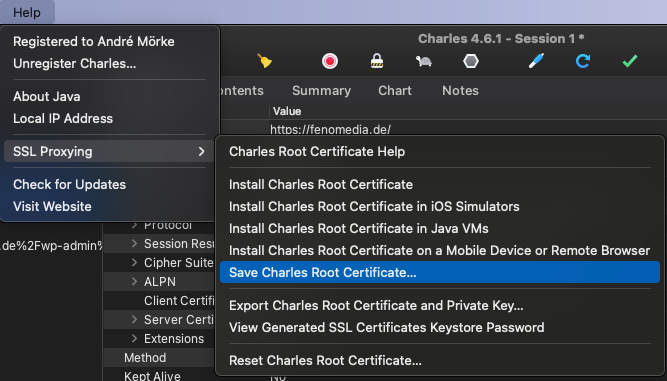
Wichtig: Wenn das Zertifikat abgelaufen Seitn sollte, muss man über „Reset Charles Root Certificate…“ im gleichen Menü ein neues erstellen und auf alle Clients aktualisieren!

MySQL Connect funktioniert nicht mit SequelPro

  • Configuration liegt unter/usr/local/etc/my.cnf
  • Go to my.cnf file and in section [mysqld] add line:default-authentication-plugin=mysql_native_password
  • Login to mysql server from terminal: run mysql -u root -p, then inside shell execute this command (replacing [password] with your actual password):ALTER USER 'root'@'localhost' IDENTIFIED WITH mysql_native_password BY '[password]';
  • exit from mysql shell with exit and run brew services restart mysql.


Quelle

Mac VSCode aus Finder starten

– Open Automator
– File -> New -> Service
– Change „Service Receives“ to „files or folders“ in „Finder“
– Add a „Run Shell Script“ action
– Change „Pass input“ to „as arguments“
– Paste the following in the shell script box: open -n -b „com.microsoft.VSCode“ –args „$*“
– Save it as something like „Open in Visual Studio Code“

Quelle

Auf dem Mac Homebrew neu installieren

Erst den alten Stand entfernen

$ cd `brew --prefix`
$ rm -rf Cellar
$ brew prune
$ rm -rf Library .git .gitignore bin/brew README.md share/man/man1/brew
$ rm -rf ~/Library/Caches/Homebrew

Dann Homebrew installieren

$ ruby -e "$(curl -fsSL https://raw.githubusercontent.com/Homebrew/install/master/install)"

Quelle